Do you want to add glossary or dictionary functionality to your WordPress site? Adding a glossary tooltip to your WordPress website improves user experience by providing quick definitions of terms without redirecting visitors to another page and also boosts SEO with auto linking for glossary terms in content, which also helps improve internal linking.
In this article, we will show you how to add a glossary or dictionary section to your WordPress site, so stay here with a coffee and read till the end.
Why Use Glossary Tooltips?
When a user is unsure about a particular term or abbreviation, a glossary tooltip gives them information about it. In this way, you can help your visitors better understand topics in your industry and create a better user experience.
- Improves User Experience: Users can understand complex terms without leaving the page.
- Reduces Bounce Rate: Keeps users engaged without unnecessary navigation.
- SEO Benefits: Enhances content quality and internal linking.
- Accessibility: Helps beginners understand industry jargon quickly.
This is especially useful for academic, technical, and industry-specific content.
- How to Add Glossary or Dictionary Section in WordPress Site?
- Step 1: Install and Activate the Plugin
- Step 2: Configure Glossary Tooltip Plugin
- Step 3: Create Glossary Terms and Enjoy!
- Step 4: Create a Glossary Page:
How to Add Glossary or Dictionary Section in WordPress Site?
To add a glossary tooltip to your WordPress site, you can use a plugin like “Glossary Tooltip” which allows you to create a glossary of terms and definitions, and display them as tooltips when the term is hovered over.
The easiest way to add glossary tooltips is by using a dedicated plugin. Here are some recommended plugins:
This is the best and simple glossary plugin which adds glossary and tooltip to your site. You can add just the glossary section without enabling tooltip feature.
Here’s a step-by-step guide:
Step 1: Install and Activate the Plugin
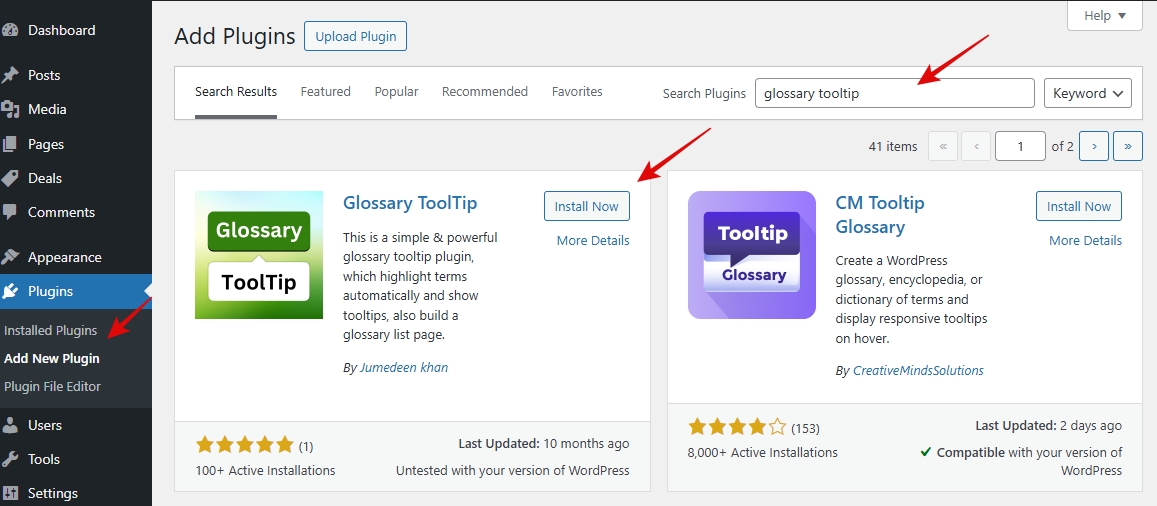
- Go to your WordPress Dashboard → Plugins → Add New.
- Search for Glossary Tooltip.
- Click Install Now, then Activate.
Step 2: Configure Glossary Tooltip Plugin
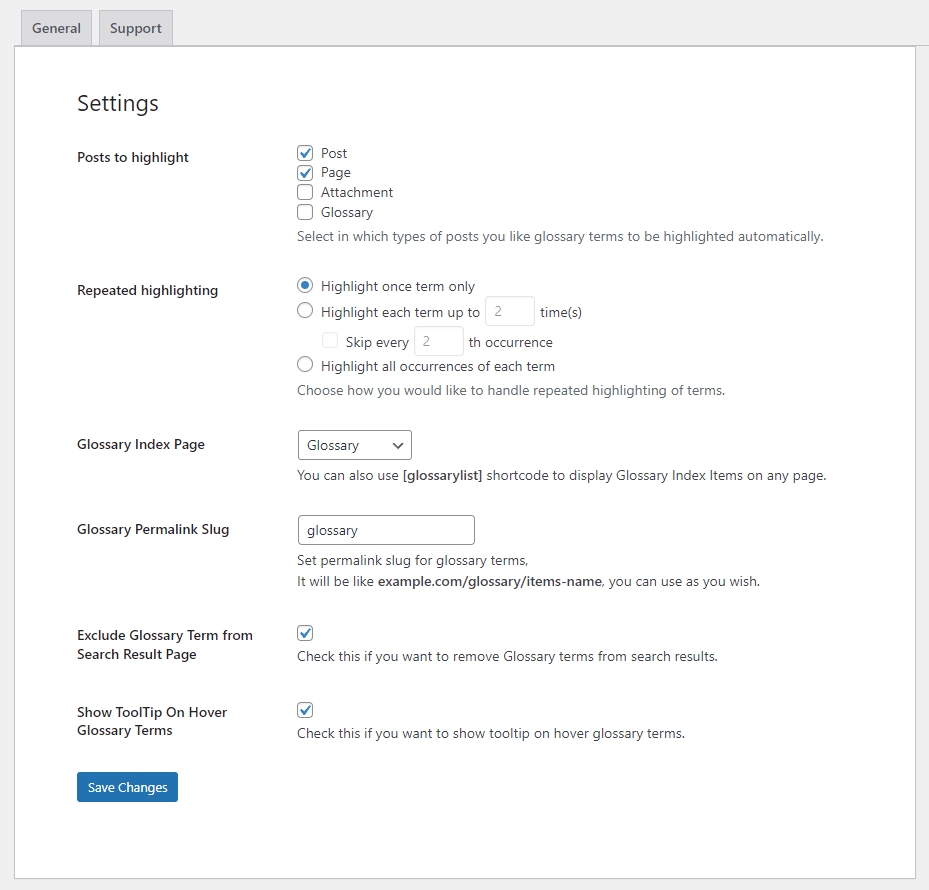
- Now go to glossary plugin settings.
- Configure settings like this screenshot.
- Click on Save changes.
Step 3: Create Glossary Terms and Enjoy!
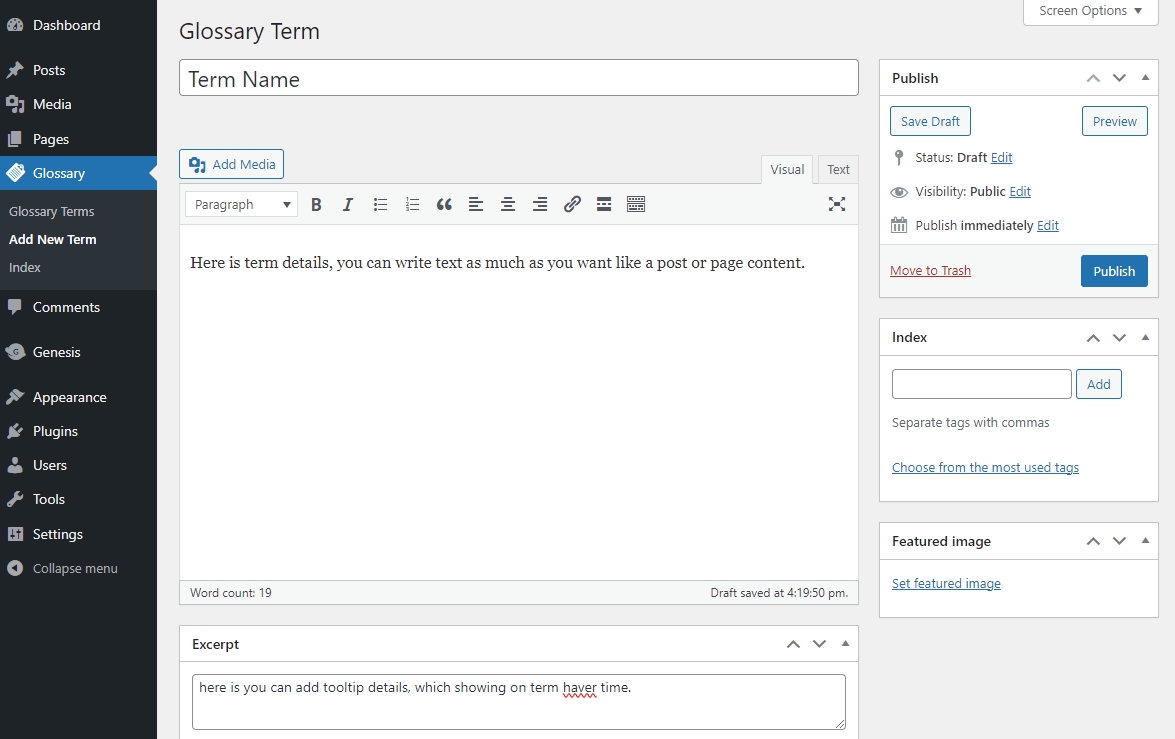
After setting up all settings, now you are ready yo create new glossary terms items.
- Go to Glossary Tooltip in the WordPress menu.
- Click Add New to create glossary terms and their definitions.
- Save the changes and publish your terms.
After publishing glossary terms, this plugin will automatically link glossary term and display tooltips on defined terms.
Step 4: Create a Glossary Page:
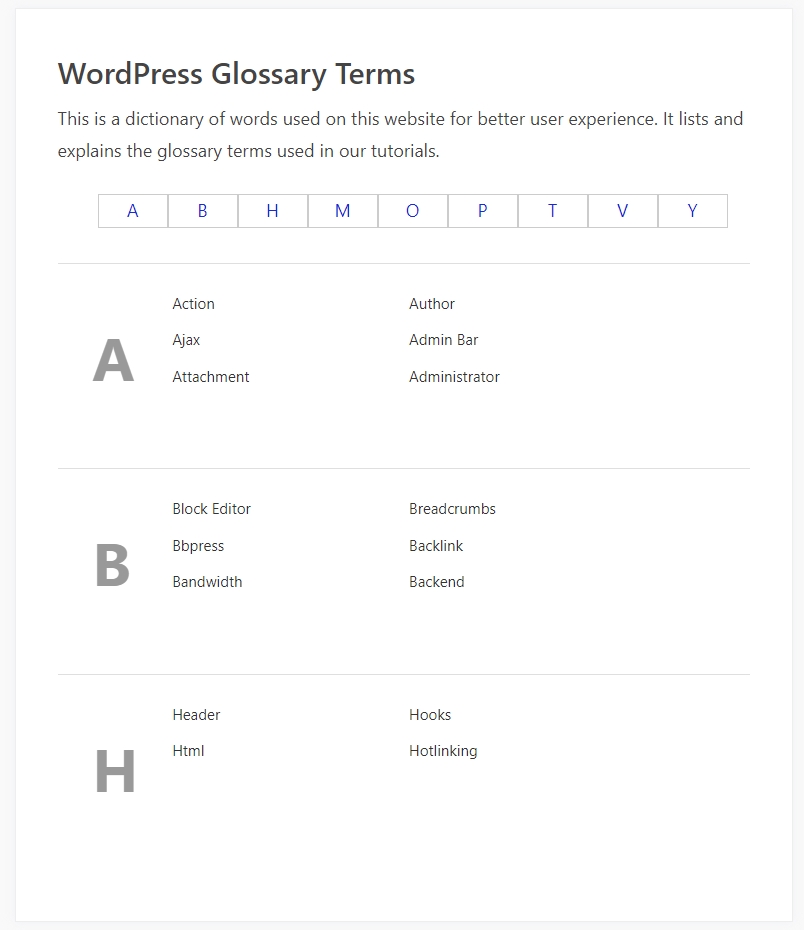
You can also create a dedicated glossary page to list all your terms and definitions. Use the plugin’s shortcode to display the glossary on this page.
Here you see a screenshot of glossary page.
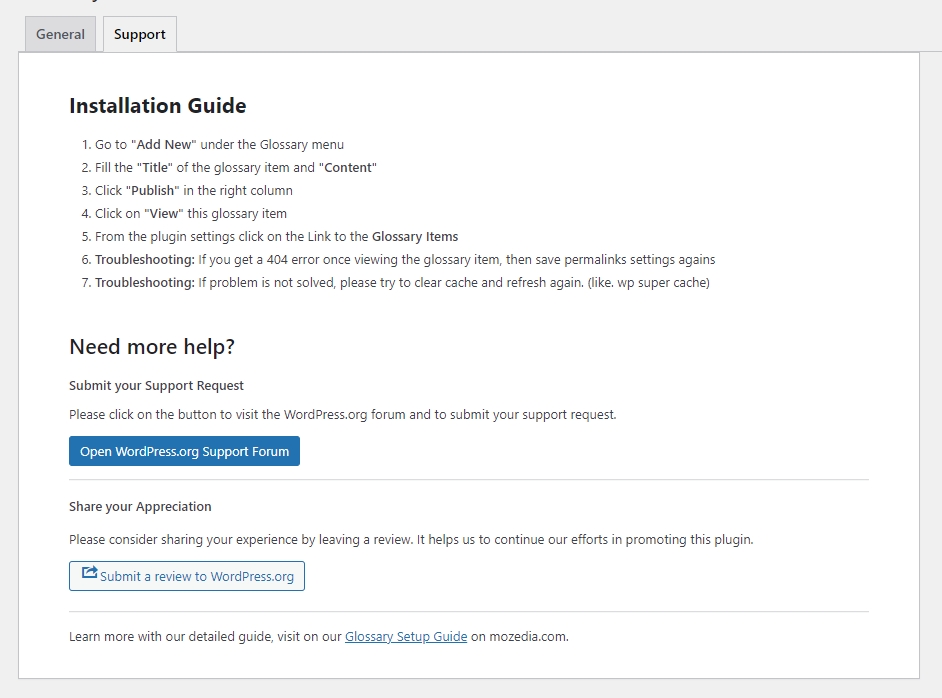
For more details, you can read this plugin installation guide, here is the screenshot.
You can also use some other plugins like CM Tooltip Glossary, Glossary and WordPress Glossary to add glossary section to your WordPress site, but Glossary Tooltip is the best and lightweight, so we recommend it.
How Glossary Tooltips Improve User Experience
Adding a glossary tooltip to your site offers several advantages that enhance user engagement and comprehension:
- Instant Definitions – Users can get quick explanations for complex terms without leaving the page, making content easier to understand.
- Seamless Navigation – Visitors remain focused on the content without unnecessary redirects to other pages, improving reading flow.
- Better Understanding – Readers grasp technical, medical, or industry-specific jargon effortlessly, making your content more accessible.
- Improved Accessibility – Helps beginners, non-experts, and new visitors understand specialized terms without extra effort.
- Enhanced SEO – Boosts internal linking and content relevance, making your site more authoritative and search-engine friendly.
How Glossary Auto-Linking Terms Improve SEO
Glossary auto-linking can significantly enhance your website’s search engine optimization (SEO) by providing structured internal links and improving content relevance. Here’s how:
- Boosts Internal Linking – Automatically linking glossary terms across multiple pages strengthens your site’s internal link structure, distributing link equity effectively.
- Enhances Keyword Optimization – Repeatedly linking important terms with relevant content helps search engines understand your site’s topic authority.
- Increases Dwell Time – Users stay longer on your website as they explore glossary definitions, reducing bounce rates.
- Improves Indexing – Search engines find and index glossary pages more efficiently, leading to better rankings for key terms.
- Provides Better User Signals – Enhanced readability and easy navigation improve user engagement, which search engines consider for ranking.
Conclusion
Adding glossary tooltips to your WordPress site is a great way to improve readability, SEO, internal linking and user engagement.
Whether you use a plugin, custom code, or shortcode, each method has its own advantages. Choose the one that best suits your needs and enhance your content with helpful tooltips.
Also read:
- How to Duplicate a Page in WordPress? (3 Easy Ways)
- Top 10 Recommended WordPress Hosting Providers 2025
Would you like assistance in customizing the tooltip appearance or functionality further? Let us know in the comments!

Great plugin sir, I really appreciate your work. It is really lightweight, no unnecessary features, easy to use even for beginners like me. I was looking for a similar glossary plugin, thanks for sharing it.
Thank you, Amit! I’m so happy to hear that you found it useful. 😄
I have a question, my friend. First, congratulations on the plugin. It’s really light and easy to use.
I would like to know how to create several terms for the letter A. For example, after creating the terms, we have to go to INDEX and put the letter A first, and then another keyword so that it is linked to the letter A, or is that not necessary?
Hi Dario,
Thank you for your kind words and congratulations on using the plugin!
To answer your question:
You don’t need to manually go to the INDEX and add the letter “A” first. The plugin automatically handles alphabetical sorting and linking for the glossary terms. Once you create the terms, the plugin will automatically link them to the relevant keywords throughout your content, without needing you to manually manage the alphabet indexing. Just make sure the terms are correctly added, and the plugin will take care of the rest.
I hope that clears things up! Let me know if you have any other questions. 😊
This is great plugin for me, actually I was trying to find a simple and lightweight glossary plugin, however I don’t need the tooltip, I only need the glossary page and auto linking words feature and this plugin allow me to enable just that, thank you very much.
Thank you very much, we will try harder to improve this plugin.